Here is how to share MacBook internet connection with iPad.
Some of you might wonder why you would want to share a MacBook internet connection with an iPad. Well, it does make sense in certain situations, such as when you’re on a restricted connection in a hotel for example.
Noted that this doesn’t work with the iPhone. Trying to Pair with an iPhone to share the internet connection just wouldn’t work. There are some valid technical reasons for this. Hopefully some of you can shed some light on this in the comment section.
Step 1: On your MacBook, go to Apple > System Preferences > Bluetooth > Turn Bluetooth On.
Step 2: Turn Bluetooth On on your iPad.
Step 3: Your iPad should show up as a new device in the Bluetooth preferences of your MacBook. Click Pair. A six digit number will appear on your MacBook. This same number should show up on your iPad. Confirm the connection by tapping “Pair” on your iPad.

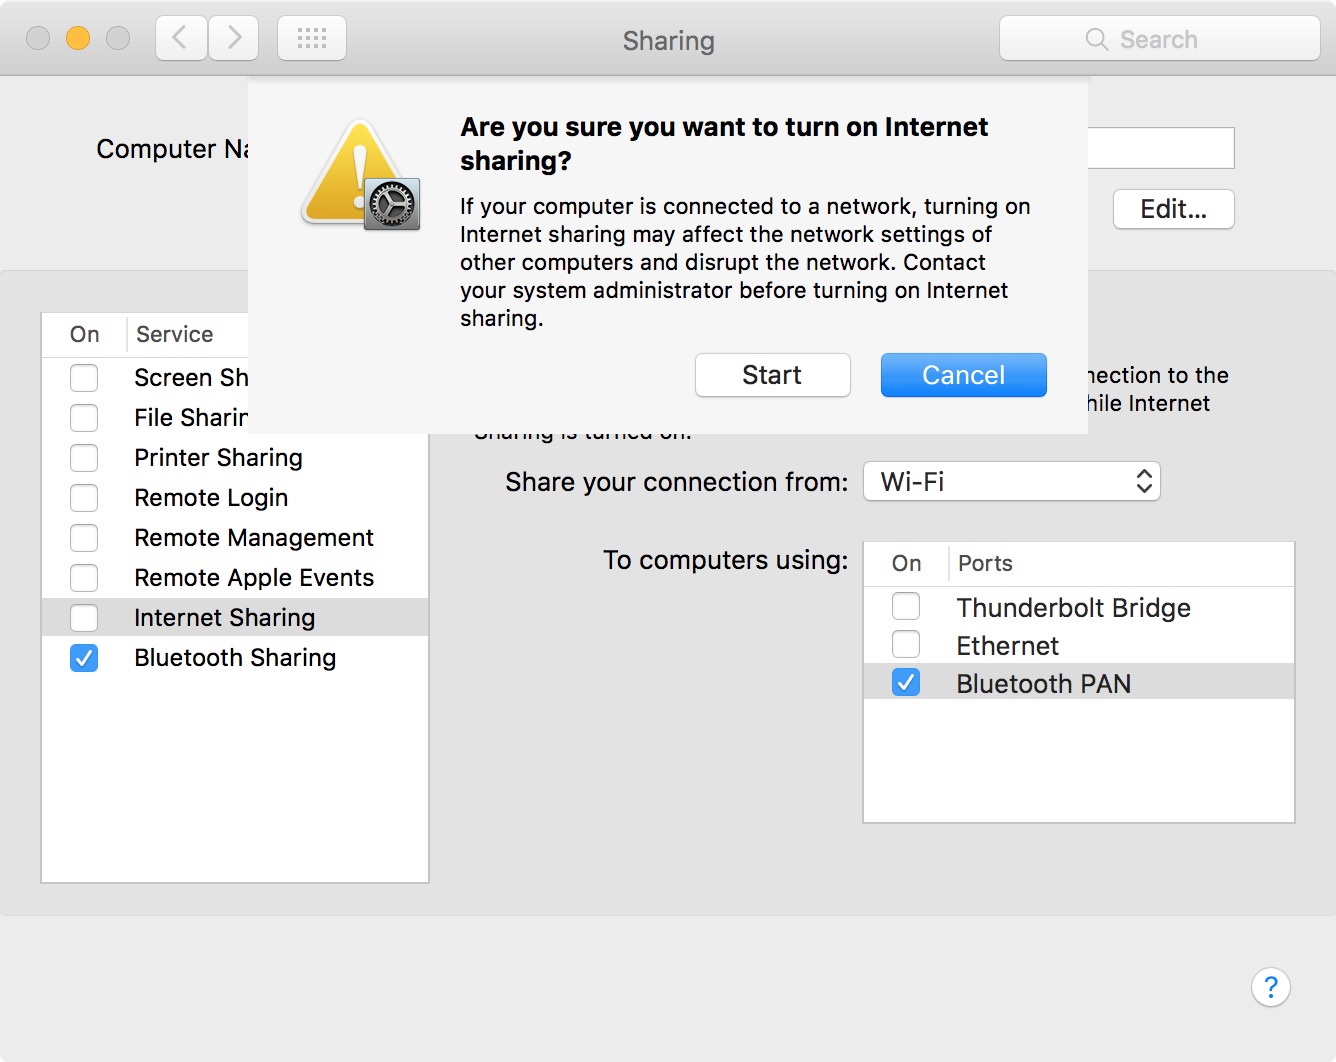
Step 4: On your MacBook, go to Apple > System Preferences > Sharing, and do the following, as showed on the screenshot below.
At this point, you should be able to get online on your iPad. Obviously, for this to work, your MacBook will have to be awake and connected to the internet.
Some of you might wonder why you would want to share a MacBook internet connection with an iPad. Well, it does make sense in certain situations, such as when you’re on a restricted connection in a hotel for example.
Noted that this doesn’t work with the iPhone. Trying to Pair with an iPhone to share the internet connection just wouldn’t work. There are some valid technical reasons for this. Hopefully some of you can shed some light on this in the comment section.
Step 1: On your MacBook, go to Apple > System Preferences > Bluetooth > Turn Bluetooth On.
Step 2: Turn Bluetooth On on your iPad.
Step 3: Your iPad should show up as a new device in the Bluetooth preferences of your MacBook. Click Pair. A six digit number will appear on your MacBook. This same number should show up on your iPad. Confirm the connection by tapping “Pair” on your iPad.
Step 4: On your MacBook, go to Apple > System Preferences > Sharing, and do the following, as showed on the screenshot below.
- Click on “Internet Sharing” from the menu on the left. Do not check the box yet!
- Select: Share your connection from “Wi-Fi” from the dropdown menu
- Check: To computers using “Bluetooth PAN”
- Check the “Internet Sharing” box from the menu on the left
- When asked if you’re sure you want to share your connection, select “Start”
At this point, you should be able to get online on your iPad. Obviously, for this to work, your MacBook will have to be awake and connected to the internet.
Comments
Post a Comment